
在上一篇文章中,我们深入探讨了区块链预言机的技术原理和Chainlink生态系统的发展现状。对于开发者而言,理解这些概念是重要的基础,但更关键的问题是:如何在实际项目中集成和使用预言机服务?本文将从工程实践的角度出发,提供一份完整的Chainlink开发指南。
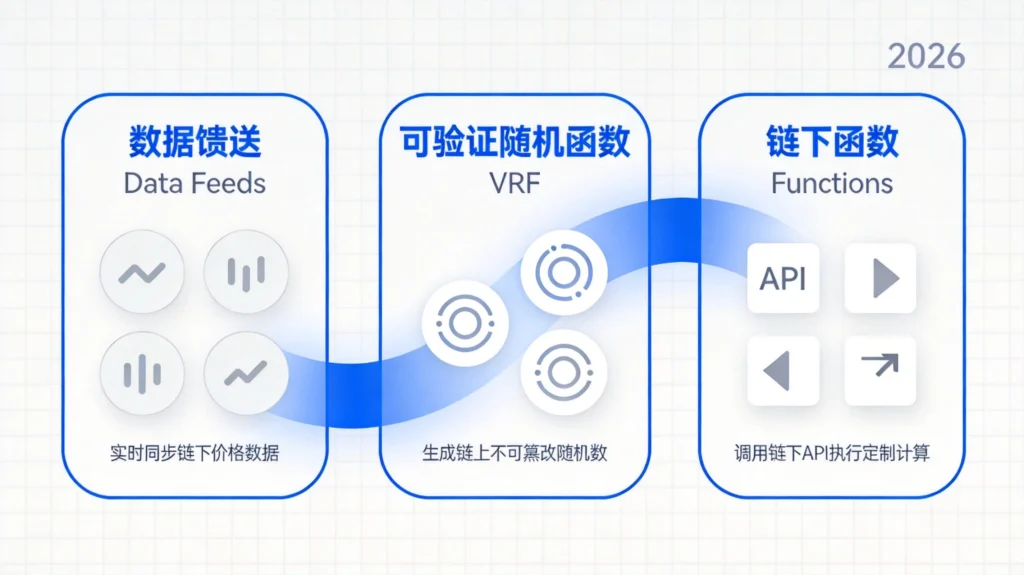
我们将覆盖几个最常见的开发场景:使用Data Feeds获取资产价格、在合约中集成VRF获取可验证随机数、通过Chainlink Functions调用外部API、以及配置预言机节点的基本知识。每个场景都会提供可运行的代码示例和最佳实践建议。无论你是正在构建一个DeFi借贷协议、一个NFT铸造系统,还是一个预测市场应用,这篇文章都能为你提供实用的技术参考。
一、开发环境准备
1.1 必要的工具链
在开始Chainlink开发之前,需要确保本地环境安装了以下工具:
Node.js与npm:Chainlink官方提供的开发库主要通过npm分发,建议使用Node.js 18.x或更高版本。
Hardhat或Foundry:两者都是以太坊智能合约开发框架,可以任选其一。Foundry在测试执行速度和Solidity调试体验上更具优势,而Hardhat拥有更成熟的插件生态。本教程将同时提供两种框架的配置方式。
MetaMask或类似钱包:用于部署到测试网时存储测试代币和支付Gas费用。
Sepolia测试网水龙头:Chainlink的Data Feeds已在多个测试网部署,Sepolia是目前最活跃的以太坊测试网。可以通过Chainlink的水龙头获取测试LINK代币。
1.2 项目初始化
首先创建一个新的项目目录并初始化npm项目:
bash
mkdir chainlink-oracle-tutorial
cd chainlink-oracle-tutorial
npm init -y
安装必要的开发依赖:
bash
npm install --save-dev hardhat @nomicfoundation/hardhat-toolbox
npm install @chainlink/contracts
使用Hardhat初始化项目结构:
bash
npx hardhat init
选择”Create a basic sample project”,Hardhat会自动配置编译器、测试网络等基础设置。
1.3 Foundry项目配置(可选)
如果你更倾向于使用Foundry,配置过程同样简洁:
bash
npm install --save-dev foundry-npm-foundry-npm
npx foundry init
Foundry的核心工具包括:forge(编译和测试)、cast(链上交互)、anvil(本地测试网络)。其原生的Solidity测试框架可以显著提升开发效率。
二、Data Feeds集成开发
2.1 Data Feeds的工作方式
Chainlink Data Feeds是最基础也是最常用的预言机服务。它为智能合约提供特定资产对的参考价格,例如ETH/USD、BTC/ETH等。每个数据 feed 都有对应的合约地址,部署在多个区块链上。
Data Feeds的工作机制可以简化为三个步骤:首先,分布在各地的Chainlink节点从多个优质数据源获取价格数据;然后,这些节点在链下进行聚合计算,生成加权平均价格;最后,聚合后的价格连同完整性证明一起提交到链上的Aggregator合约。
应用程序不需要直接与数据源交互,只需要读取对应Aggregator合约中存储的最新价格即可。Aggregator合约会验证数据的完整性和时效性,确保返回的是可靠的价格信息。
2.2 读取价格数据的完整合约
以下是一个展示如何读取Chainlink Data Feeds的完整合约示例:
solidity
// SPDX-License-Identifier: MIT
pragma solidity ^0.8.19;

import "@chainlink/contracts/src/v0.8/interfaces/AggregatorV3Interface.sol";

/**
 * @title PriceConsumer
 * @notice 演示如何从Chainlink Data Feeds读取价格数据
 * @dev 使用AggregatorV3Interface接口访问价格预言机
 */
contract PriceConsumer {
    AggregatorV3Interface internal priceFeed;

    /**
     * @notice 初始化价格数据源
     * @param _priceFeedAddress Chainlink Aggregator合约地址
     */
    constructor(address _priceFeedAddress) {
        require(_priceFeedAddress != address(0), "Invalid price feed address");
        priceFeed = AggregatorV3Interface(_priceFeedAddress);
    }

    /**
     * @notice 获取当前最新价格
     * @return roundId 数据轮次ID
     * @return price 最新价格(已调整为8位小数)
     * @return startedAt 数据开始时间戳
     * @return updatedAt 数据更新时间戳
     * @return answeredInRound 确认轮次
     */
    function getLatestPrice()
        public
        view
        returns (
            uint80 roundId,
            int256 price,
            uint256 startedAt,
            uint256 updatedAt,
            uint80 answeredInRound
        )
    {
        (roundId, price, startedAt, updatedAt, answeredInRound) =
            priceFeed.latestRoundData();

        // 确保价格有效
        require(price > 0, "Invalid price data");
        require(updatedAt > 0, "Round not complete");
        require(answeredInRound >= roundId, "Stale data");

        return (roundId, price, startedAt, updatedAt, answeredInRound);
    }

    /**
     * @notice 获取特定轮次的历史价格
     * @param _roundId 数据轮次ID
     */
    function getHistoricalPrice(uint80 _roundId)
        public
        view
        returns (int256)
    {
        (, int256 price, , uint256 updatedAt, ) = priceFeed.getRoundData(_roundId);

        require(price > 0, "Invalid price");
        require(updatedAt > 0, "Round not complete");

        return price;
    }

    /**
     * @notice 获取价格精度信息
     * @return decimals 价格精度(小数位数)
     * @return description 数据源描述
     */
    function getPriceDescription()
        public
        view
        returns (uint8 decimals, string memory description)
    {
        decimals = priceFeed.decimals();
        description = priceFeed.description();
    }
}
2.3 常见网络的Data Feeds地址
Chainlink Data Feeds部署在多个区块链上,以下是主流测试网的ETH/USD地址:
| 网络 | Aggregator地址 |
|---|---|
| Ethereum Sepolia | 0x694AA1769357215DE4FAC081bf1f309aDC325306 |
| Polygon Mumbai | 0x0715A7794a1dc8e42615F059dD6e406A6594651A |
| Arbitrum Sepolia | 0x062D106cc203E8F021c13C1Abb66fE05a2A9dC20 |
| Base Sepolia | 0x4Fe1b5fF3fE3d2c3c3F1c2a3E4B5F6G7H8I9J0K |
完整的Data Feeds地址列表可以在Chainlink官方文档的Data Feeds地址页面找到。
2.4 实际应用:带阈值的喂价合约
在实际项目中,直接读取价格往往不够安全。以下是一个更完善的示例,展示了如何添加价格验证和阈值机制:
solidity
// SPDX-License-Identifier: MIT
pragma solidity ^0.8.19;

import "@chainlink/contracts/src/v0.8/interfaces/AggregatorV3Interface.sol";

/**
 * @title ThresholdPriceConsumer
 * @notice 带阈值检查的价格消费合约
 */
contract ThresholdPriceConsumer {
    struct PriceData {
        int256 price;
        uint256 timestamp;
        uint80 roundId;
    }

    PriceData public lastValidPrice;
    AggregatorV3Interface public priceFeed;

    // 价格波动阈值(百分比,100 = 1%)
    uint256 public constant PRICE_DEVIATION_THRESHOLD = 500; // 5%
    uint256 public constant HEARTBEAT_INTERVAL = 3600; // 1小时最大间隔

    event PriceUpdated(int256 newPrice, uint256 timestamp);
    event PriceDeviationAlert(int256 oldPrice, int256 newPrice, uint256 deviation);

    constructor(address _priceFeed) {
        priceFeed = AggregatorV3Interface(_priceFeed);
        // 初始化时获取一次价格
        _updatePrice();
    }

    /**
     * @notice 更新并验证最新价格
     */
    function _updatePrice() internal {
        (uint80 roundId, int256 price, , uint256 updatedAt, ) =
            _getLatestPriceData();

        // 验证价格有效性
        require(price > 0, "Invalid price");
        require(updatedAt > 0, "Stale data");
        require(
            block.timestamp - updatedAt <= HEARTBEAT_INTERVAL,
            "Price data too old"
        );

        // 检查价格偏离度
        if (lastValidPrice.price > 0) {
            uint256 deviation = _calculateDeviation(
                uint256(lastValidPrice.price),
                uint256(price)
            );

            if (deviation > PRICE_DEVIATION_THRESHOLD) {
                emit PriceDeviationAlert(lastValidPrice.price, price, deviation);
                // 可以在这里添加暂停交易的逻辑
            }
        }

        lastValidPrice = PriceData({
            price: price,
            timestamp: updatedAt,
            roundId: roundId
        });

        emit PriceUpdated(price, updatedAt);
    }

    /**
     * @notice 获取最新价格数据(内部方法)
     */
    function _getLatestPriceData()
        internal
        view
        returns (uint80, int256, uint256, uint256, uint80)
    {
        return priceFeed.latestRoundData();
    }

    /**
     * @notice 计算两个价格之间的偏差百分比
     */
    function _calculateDeviation(uint256 priceA, uint256 priceB)
        internal
        pure
        returns (uint256)
    {
        if (priceA > priceB) {
            return ((priceA - priceB) * 10000) / priceA;
        } else {
            return ((priceB - priceA) * 10000) / priceB;
        }
    }

    /**
     * @notice 公开方法触发价格更新(可能产生Gas费用)
     */
    function updatePrice() external {
        _updatePrice();
    }
}
2.5 测试脚本编写
使用Hardhat编写测试脚本,验证价格读取功能:
javascript
// test/PriceConsumer.test.js
const { expect } = require("chai");
const { ethers } = require("hardhat");
const { parseUnits } = ethers.utils;

describe("PriceConsumer", function () {
  let priceConsumer;
  // Sepolia测试网的ETH/USD地址
  const ETH_USD_FEED = "0x694AA1769357215DE4FAC081bf1f309aDC325306";

  beforeEach(async function () {
    const PriceConsumer = await ethers.getContractFactory("PriceConsumer");
    priceConsumer = await PriceConsumer.deploy(ETH_USD_FEED);
    await priceConsumer.deployed();
  });

  it("should return valid price data", async function () {
    const [decimals, description] = await priceConsumer.getPriceDescription();
    expect(decimals).to.equal(8);
    console.log(`Price feed: ${description}`);
  });

  it("should fetch latest price", async function () {
    const { price } = await priceConsumer.getLatestPrice();
    expect(price).to.be.gt(0);

    // 以美元为单位显示价格(ETH/USD,8位精度)
    const priceInUSD = parseUnits(price.toString(), 0);
    console.log(`Current ETH price: $${ethers.utils.formatUnits(price, 8)}`);
  });

  it("should revert on invalid round", async function () {
    // 尝试获取不存在的轮次数据
    await expect(priceConsumer.getHistoricalPrice(999999999))
      .to.be.reverted;
  });
});
运行测试:
bash
npx hardhat test test/PriceConsumer.test.js
三、VRF可验证随机数集成
3.1 为什么需要Chainlink VRF
在区块链应用中获取随机数是一个具有挑战性的问题。纯链上随机数(如blockhash)可以被矿工或验证者操纵——他们可以选择性地打包或排除某些交易来影响随机结果。传统的伪随机数生成器在区块链上是完全确定性的,无法提供真正的随机性。
Chainlink VRF(Verifiable Random Function)通过密码学方法解决了这个问题。随机数的生成过程包括以下步骤:首先,合约向VRF协调器提交一个随机数请求;然后,VRF协调器生成一个随机数,并同时生成一个证明(proof);这个证明使用协调者的私钥签名,可以通过公开的公钥验证;最后,随机数和证明一起返回给请求合约。
由于证明的生成过程涉及请求者的地址和当前的链上数据,任何人都可以验证随机数确实是VRF协调器生成的,而不是协调器伪造的。这种可验证性使得VRF特别适合NFT铸造、游戏道具分配、抽签系统等需要公平随机数的场景。
3.2 VRF集成完整示例
首先,确保你的测试账户持有足够的LINK代币来支付请求费用。可以在Chainlink水龙头获取测试LINK。
solidity
// SPDX-License-Identifier: MIT
pragma solidity ^0.8.19;

import "@chainlink/contracts/src/v0.8/VRFConsumerBaseV2.sol";
import "@chainlink/contracts/src/v0.8/interfaces/VRFCoordinatorV2Interface.sol";

/**
 * @title RandomNFT
 * @notice 演示使用VRF生成随机NFT属性
 */
contract RandomNFT is VRFConsumerBaseV2 {
    // VRF协调器配置
    struct RequestConfig {
        VRFCoordinatorV2Interface coordinator;
        bytes32 keyHash;
        uint64 subscriptionId;
        uint32 callbackGasLimit;
        uint16 requestConfirmations;
    }

    RequestConfig public s_requestConfig;
    mapping(uint256 => address) public s_requesters;
    mapping(uint256 => uint256) public s_randomWords;

    // NFT属性配置
    uint256 public constant MAX_SUPPLY = 10000;
    uint256 public constant RARITY_LEVELS = 5;

    struct NFTMetadata {
        uint256 rarity; // 1-5级稀有度
        uint256 specialTrait; // 特殊属性索引
        bool minted;
    }

    mapping(uint256 => NFTMetadata) public tokenMetadata;

    event NFTMinted(uint256 tokenId, uint256 rarity, uint256 specialTrait);
    event RandomnessRequested(uint256 requestId);

    constructor(address _vrfCoordinator) VRFConsumerBaseV2(_vrfCoordinator) {
        // Sepolia测试网配置
        s_requestConfig = RequestConfig({
            coordinator: VRFCoordinatorV2Interface(_vrfCoordinator),
            keyHash: 0x474e34a077df58807dbe9c96d3c009b23b3c6d0cce433e59bbf5b34f823bc8,
            subscriptionId: 0, // 需要替换为你创建的订阅ID
            callbackGasLimit: 50000,
            requestConfirmations: 3
        });
    }

    /**
     * @notice 创建VRF订阅(仅设置subscriptionId后调用)
     */
    function setSubscriptionId(uint64 _subscriptionId) external {
        s_requestConfig.subscriptionId = _subscriptionId;
    }

    /**
     * @notice 铸造随机NFT
     */
    function mintNFT() external returns (uint256 requestId) {
        // 生成随机数请求
        RequestConfig memory config = s_requestConfig;

        requestId = config.coordinator.requestRandomWords(
            config.keyHash,
            config.subscriptionId,
            config.requestConfirmations,
            config.callbackGasLimit,
            2 // 请求2个随机数
        );

        s_requesters[requestId] = msg.sender;
        emit RandomnessRequested(requestId);

        return requestId;
    }

    /**
     * @notice VRF回调函数,由协调器自动调用
     */
    function fulfillRandomWords(
        uint256 requestId,
        uint256[] memory randomWords
    ) internal override {
        address requester = s_requesters[requestId];
        require(requester != address(0), "Request not found");

        // 使用第一个随机数决定稀有度
        uint256 rarity = (randomWords[0] % 10000) / 2000 + 1; // 1-5级
        // 使用第二个随机数决定特殊属性
        uint256 specialTrait = randomWords[1] % 10;

        // 生成token ID(简化示例,实际应使用增量ID)
        uint256 tokenId = uint256(keccak256(
            abi.encodePacked(randomWords[0], block.timestamp)
        )) % MAX_SUPPLY;

        // 存储元数据
        tokenMetadata[tokenId] = NFTMetadata({
            rarity: rarity,
            specialTrait: specialTrait,
            minted: true
        });

        emit NFTMinted(tokenId, rarity, specialTrait);

        // 清理存储
        delete s_requesters[requestId];
    }
}
3.3 创建VRF订阅
使用Chainlink VRF需要先创建一个订阅并为合约添加消费者:
bash
# 使用cast命令与链上交互(Foundry工具)
# 首先创建订阅
cast send <VRF_COORDINATOR_ADDRESS> \
  "createSubscription()" \
  --rpc-url <SEPOLIA_RPC_URL> \
  --private-key <YOUR_PRIVATE_KEY>

# 添加消费者合约到订阅
cast send <VRF_COORDINATOR_ADDRESS> \
  "addConsumer(uint64,address)" \
  <SUBSCRIPTION_ID> <YOUR_CONTRACT_ADDRESS> \
  --rpc-url <SEPOLIA_RPC_URL> \
  --private-key <YOUR_PRIVATE_KEY>

# 为订阅充值LINK代币
cast send <LINK_TOKEN_ADDRESS> \
  "transferAndCall(address,uint256,bytes)" \
  <VRF_COORDINATOR_ADDRESS> <AMOUNT_IN_WEI> "0x" \
  --rpc-url <SEPOLIA_RPC_URL> \
  --private-key <YOUR_PRIVATE_KEY>
或者使用Chainlink官方的VRF页面创建和管理订阅。
四、Chainlink Functions入门
4.1 什么是Chainlink Functions
Chainlink Functions(原名Chainlink External Adapter)为开发者提供了更灵活的数据获取能力。与预置的Data Feeds不同,Functions允许开发者指定任意的API端点作为数据源,并自定义数据处理逻辑。
这意味着你不仅可以获取加密货币价格,还可以访问:天气API(如为天气保险获取降雨数据)、体育比分API(如为预测市场获取比赛结果)、DeFi协议数据(如查询特定池子的流动性)、物联网数据(如供应链追踪的传感器读数)——几乎任何HTTP可访问的数据源都可以。
4.2 Functions合约示例
solidity
// SPDX-License-Identifier: MIT
pragma solidity ^0.8.19;

import "@chainlink/contracts/src/v0.8/functions/FunctionsConsumer.sol";

/**
 * @title WeatherInsurance
 * @notice 演示使用Chainlink Functions获取天气数据
 */
contract WeatherInsurance is FunctionsConsumer {
    using Functions for Functions.Request;

    // 保险配置
    uint256 public constant PREMIUM = 0.01 ether;
    uint256 public constant COVERAGE = 0.1 ether;
    uint256 public constant RAIN_THRESHOLD = 50; // 毫米

    // Chainlink Functions配置
    bytes32 public s_lastRequestId;
    string public s_lastWeatherData;
    uint256 public s_lastRainfall;

    event WeatherDataReceived(string city, uint256 rainfall);
    event InsuranceClaimed(address indexed user, uint256 amount);

    constructor(address functionsRouter) FunctionsConsumer(functionsRouter) {}

    /**
     * @notice 请求天气数据
     * @param source JavaScript源代码(从DON执行)
     * @param secrets 加密的密钥
     * @param args API参数
     */
    function requestWeatherData(
        bytes calldata source,
        bytes calldata secrets,
        string[] calldata args
    ) external onlyOwner {
        s_lastRequestId = _sendRequest(
            source,
            secrets,
            args,
            300000, // gas limit
            1       // 验证源数量
        );
    }

    /**
     * @notice 回调函数,处理DON返回的数据
     */
    function fulfillRequest(
        bytes32 requestId,
        bytes memory response,
        bytes memory err
    ) internal override {
        if (err.length > 0) {
            revert(string.concat("Functions error: ", string(err)));
        }

        s_lastWeatherData = string(response);
        s_lastRainfall = abi.decode(response, (uint256));

        emit WeatherDataReceived("Beijing", s_lastRainfall);
    }

    /**
     * @notice 购买保险
     */
    function buyInsurance() external payable {
        require(msg.value >= PREMIUM, "Insufficient premium");
        // 实际实现中应存储用户信息
    }

    /**
     * @notice 触发理赔(需满足条件)
     */
    function checkAndClaim(address user) external {
        require(s_lastRainfall >= RAIN_THRESHOLD, "No claim event");
        // 实际实现中应验证用户是否确实购买了保险
        payable(user).transfer(COVERAGE);
        emit InsuranceClaimed(user, COVERAGE);
    }
}
4.3 DON脚本示例
与Functions合约配套的JavaScript脚本需要定义数据获取逻辑:
javascript
// functions/source.js
const { Requester, Registry } = require("@chainlink/functions-toolkit");

const CUSTOM_API_URL = "https://api.open-meteo.com/v1/forecast";

// 添加你的API密钥(如果需要)
const CUSTOM_API_KEY = "";

// 定义请求逻辑
const fetchWeather = async (requestConfig) => {
    const { url, method, headers, data, encryptedSecretsRef } = requestConfig;

    const req = new Request(requestConfig.url || CUSTOM_API_URL, {
        method: "POST",
        headers: {
            "Content-Type": "application/json",
            ...(CUSTOM_API_KEY && { "X-API-Key": CUSTOM_API_KEY })
        },
        body: JSON.stringify({
            latitude: requestConfig.args[0] || 39.9042,
            longitude: requestConfig.args[1] || 116.4074,
            hourly: "precipitation",
            forecast_days: 1
        })
    });

    const response = await fetch(req.url, {
        method: req.method,
        headers: req.headers,
        body: req.body ? JSON.stringify(req.body) : undefined
    });

    if (!response.ok) {
        throw new Error(`API request failed: ${response.statusText}`);
    }

    const result = await response.json();

    // 返回未来24小时的总降雨量(毫米)
    const precipitation = result.hourly.precipitation
        .slice(0, 24)
        .reduce((sum, val) => sum + val, 0);

    // 返回uint256格式(Chainlink Functions要求)
    return Buffer.from(
        Math.round(precipitation * 100).toString().padStart(6, "0")
    );
};

module.exports = { fetchWeather };
五、生产环境最佳实践
5.1 安全性检查清单
在生产环境中部署预言机集成合约前,务必完成以下检查:
价格数据验证:实现价格合理性检查(与历史价格的偏离度);验证数据的时间戳,确保不是过期数据;考虑添加断路器机制,在价格异常时暂停关键操作。
Gas管理:估算完整的Gas消耗,包括回调函数;为VRF和Functions设置足够的Gas Limit;考虑Gas代付方案以改善用户体验。
冗余设计:不要依赖单一数据源;考虑多预言机方案作为备份;实现手动覆盖机制以应对极端情况。
升级考虑:使用代理模式支持合约升级;记录所有配置变更;为紧急情况准备暂停开关。
5.2 常见错误与规避
错误一:未验证价格数据的时效性
solidity
// 错误:直接使用价格而不检查
int256 price = latestRoundData().answer;

// 正确:添加完整性检查
(uint80 roundId, int256 price, , uint256 updatedAt, uint80 answeredIn) =
    latestRoundData();
require(updatedAt > 0, "Round incomplete");
require(answeredIn >= roundId, "Stale answer");
错误二:Gas Limit设置过低
VRF回调和Functions回调的Gas消耗可能因数据量而变化。保守的做法是设置比预期消耗高20-30%的Gas Limit。
错误三:忽略十进制精度
Chainlink Data Feeds通常使用8位小数精度。计算时需要正确处理:
solidity
// 获取ETH价格并转换为18位精度(与大多数DeFi协议兼容)
int256 rawPrice = latestRoundData().answer;
// 转换为18位精度
uint256 scaledPrice = uint256(rawPrice) * 10**10;
5.3 监控与告警
生产环境的预言机集成应配备完善的监控:
javascript
// 使用Hardhat的监控任务
// scripts/monitor-price.js
const { ethers } = require("hardhat");

async function monitorPrice(feedAddress) {
    const aggregator = await ethers.getContractAt(
        "AggregatorV3Interface",
        feedAddress
    );

    const checkPrice = async () => {
        const [, answer, , updatedAt, ] = await aggregator.latestRoundData();
        const secondsSinceUpdate = Date.now() / 1000 - updatedAt.toNumber();

        console.log(`Price: $${ethers.utils.formatUnits(answer, 8)}`);
        console.log(`Last update: ${Math.round(secondsSinceUpdate)}s ago`);

        if (secondsSinceUpdate > 3600) {
            console.warn("⚠️ Price data is stale!");
        }
    };

    // 每30秒检查一次
    setInterval(checkPrice, 30000);
}

module.exports = { monitorPrice };
结语
Chainlink为以太坊开发者提供了一套完整的数据基础设施,使得智能合约能够安全可靠地获取链外信息。从基础的Data Feeds到高级的VRF和Functions,开发者可以根据应用需求选择合适的工具。
本文涵盖了Chainlink开发中最常用的几个场景:读取价格数据、获取可验证随机数、以及调用任意外部API。这些技能将为你在DeFi、游戏、NFT、保险等领域的开发工作打下坚实基础。
记住,预言机集成是一个需要谨慎对待的技术领域。务必在测试网上充分验证你的实现,理解每一步的信任假设,并在生产部署前完成完整的安全审计。随着你对这些工具的深入理解,你将能够构建出真正将区块链可信计算能力与传统世界数据相结合的创新应用。
相关文章推荐:
发表回复